Creating Your Ecommerce Empire: Unleash the Power of WooCommerce
In the vast, bustling marketplace of the internet, having your own online store is the key to carving out your slice of the pie. Whether you’re a small business stepping into the world of ecommerce or an individual eager to transform a passion into profit, building an online store might just be the game-changer you need. However, the process can often seem daunting. With the myriad of options available and technical jargon being thrown around, where does one begin?
Enter WooCommerce – a free, open-source plugin for WordPress that brings ecommerce functionality right to your fingertips. It’s accessible, feature-rich, and flexible, powering over 30% of all online stores worldwide. With WooCommerce, you can set up your store, add products, and start selling, all without writing a single line of code. It’s a tool that has revolutionized ecommerce, breaking down the barriers to entry and making the dream of owning an online store a reality for millions.
In this comprehensive guide, we’re going to break down the process of building your online store using WooCommerce. We’ll guide you step-by-step, demystify the jargon, and equip you with all the knowledge and tools you need to make your ecommerce venture a success. So grab a coffee, get comfortable, and let’s embark on your WooCommerce journey!
Step 1. Get a Domain Name & Hosting
To start building your online store, you’ll need two things:
Domain Name: Your Domain name is the unique name that represents your website on the internet.
Web Hosting: Web hosting is what allows you to store all of your websites content on a secure server, making your website accessible via the web!
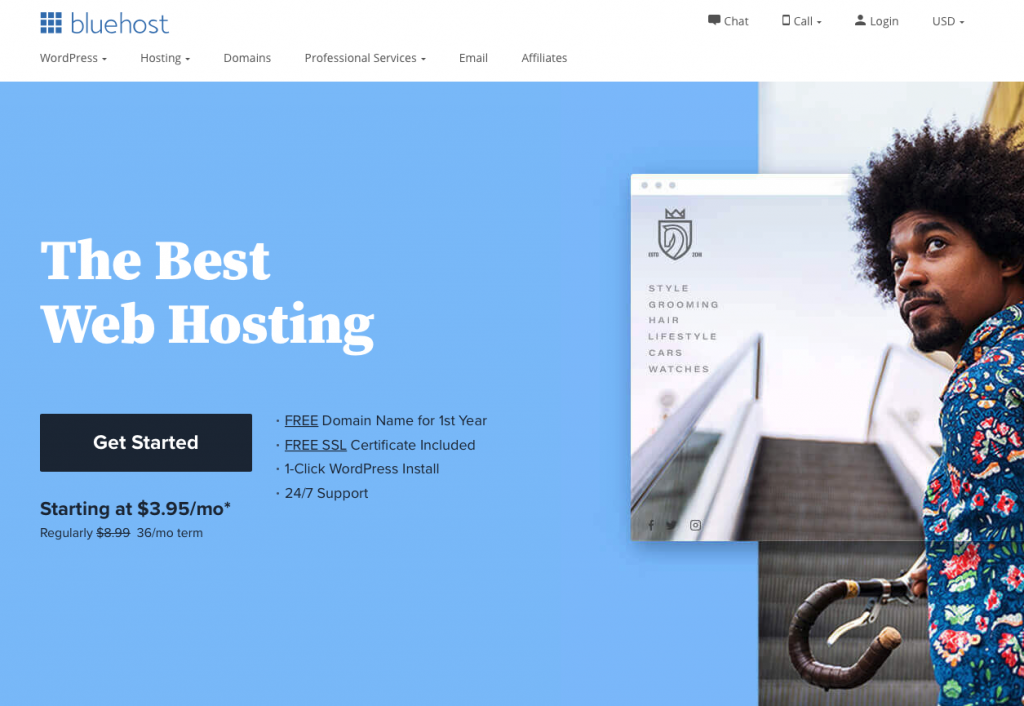
We highly recommend Bluehost to buy domains and host your website! We’ve used many different providers over the years and have found Bluehost to be the most reliable and easiest to use, in our opinion.
Also, if you signup for hosting with Bluehost you will get a domain registration FREE for the first year. We always recommend getting your domain from the same company as your hosting if possible, as it makes getting your site up and running a bit easier and will typically save you money.
1. To get started, simply Click Here and then click “Get Started” as shown below.
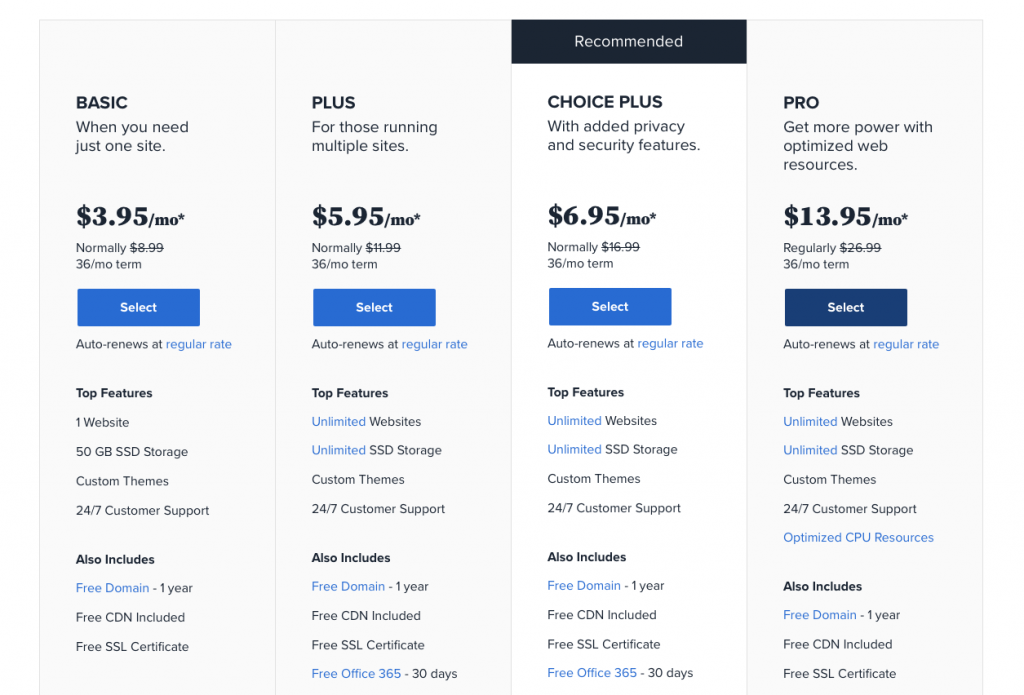
2. Next, you will need to choose your hosting plan. We recommend Choice Plus, but this option is up to you.
3. Now it’s time to choose and register your domain (Free for 12 months).
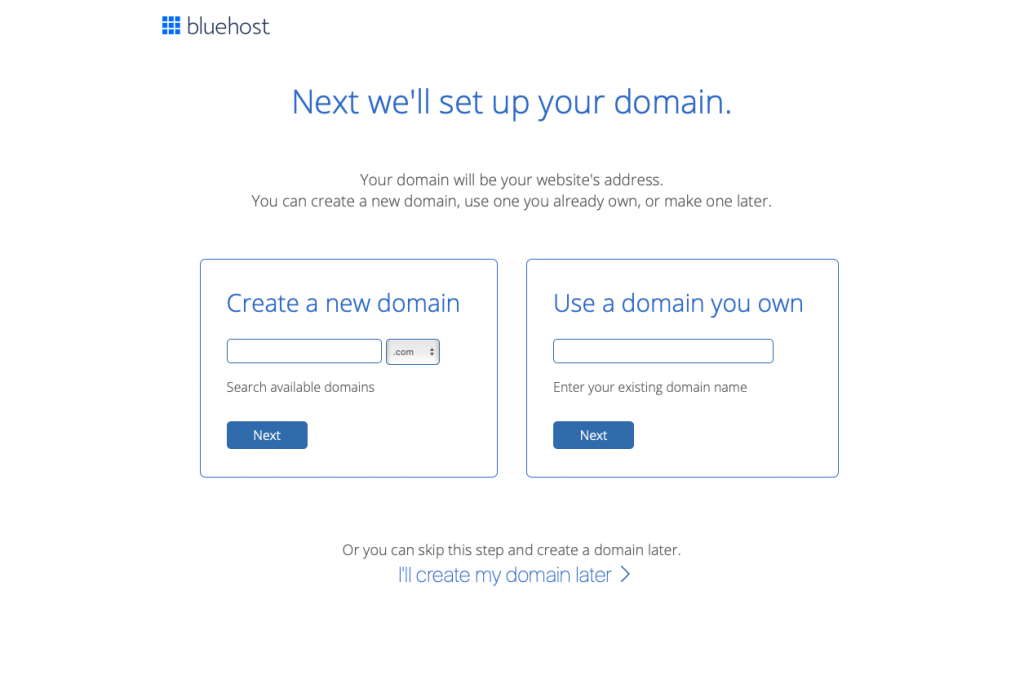
As we stated before, if you setup a new hosting plan with Bluehost you will get a free domain registration for 12 months! If you already own a domain, you can enter it on the right under “Use a domain you own.” Keep in mind, if you are going to be using a domain you already own, there will be a few extra steps to take after your hosting account registration is complete, such as modifying your name servers. Bluehost provides instructions on how to do this here.
PRO TIP: When choosing your domain name, you will notice that there is a drop down with multiple domain “extensions.” We highly suggest going for a .COM domain name! If the domain you are looking for is not available in .COM – a few good alternatives are .CO / .NET / .ORG
Step 2. Install Your WordPress Site
Now that you have your domain registered and hosting account setup, it’s time to setup your website. We highly recommend using WordPress as the platform to build your site on, and bluehost makes it easy to do so.
In order to setup your website on WordPress, you will need to do what is called a “Site Installation.” This is very easy to do, and will only need to be done once (unless you decide to build a new website).
Simply follow the instructions below:
- Login to your Bluehost account.
- From the left sidebar menu, click “My Sites”
- Next click the “Create Site” button.
- Enter the basic information it asks you about your website, and the installation will begin.
- Once the installation is complete, you will be given the all of the information and credential you need to access your WordPress site.
Now you can head over to your domain and check out your new website to make sure the installation worked!
Step 3. Install WooCommerce
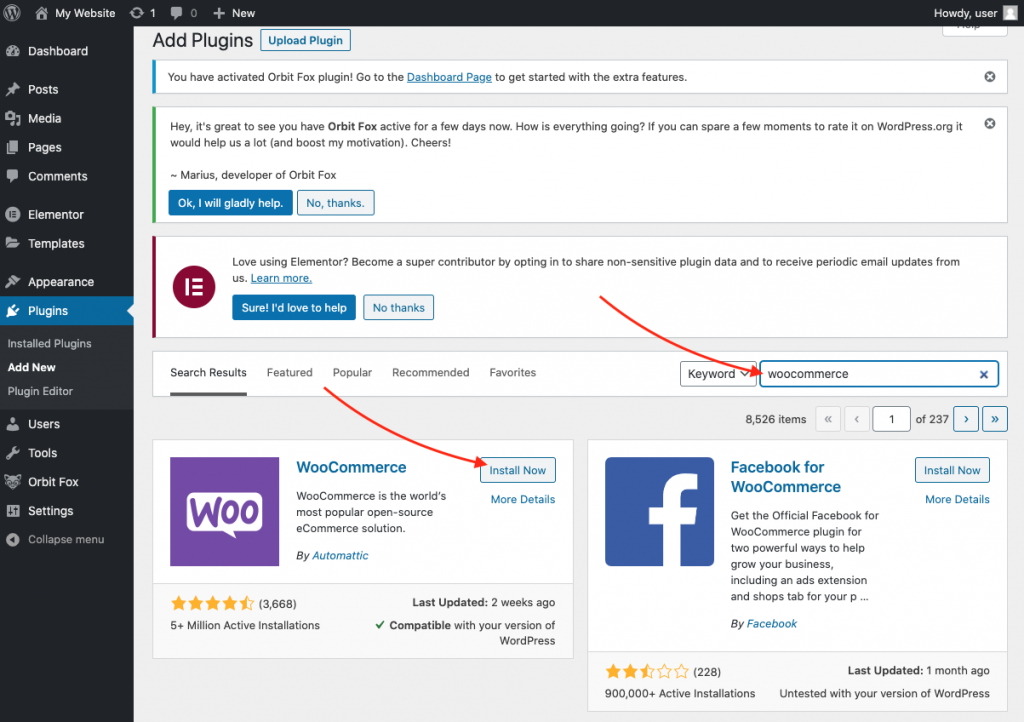
To install WooCommerce, simply do the following:
- Go to your WordPress admin dashboard
- On the left sidebar menu, under “Plugins” click “Add New”
- In the search bar type “woocommerce” and you will see WooCommerce show up as a result
- Click “Install Now” and then “Activate“
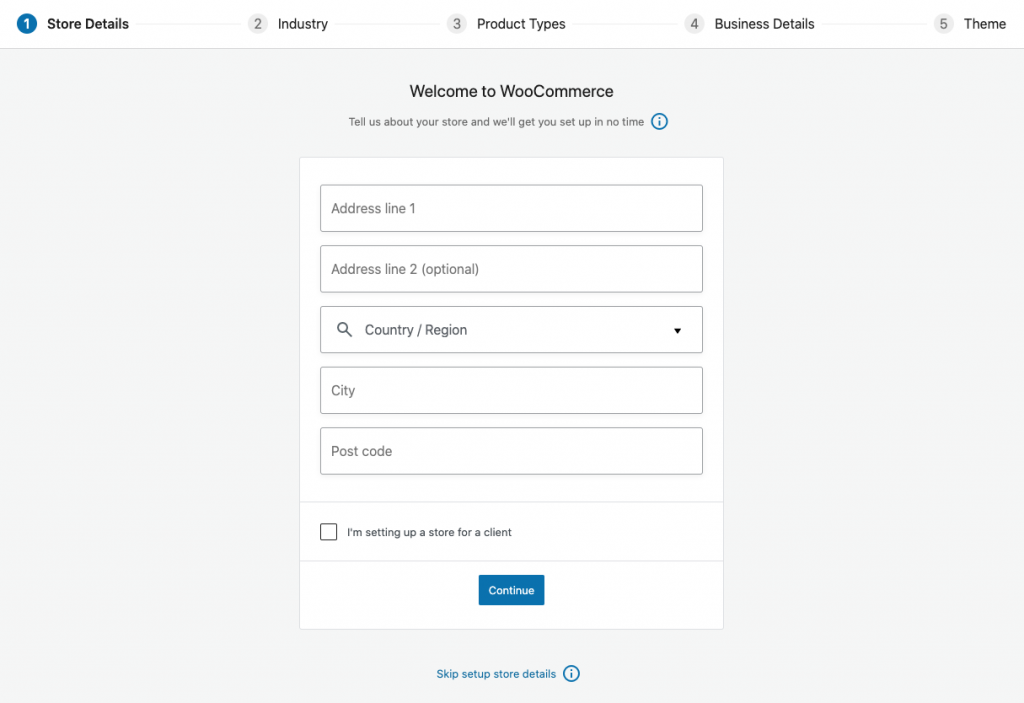
Next you will be prompted to run through a store setup wizard. Simple enter all of the information asked of you, and the wizard will guide you through this entire process!
Add Necessary Store Pages
There are a few important and essential pages an online store must have in order to function correctly.
These pages include:
Shop Page: This is where anyone visiting your site can view the products you have for sale.
Cart Page: When your shoppers add your items to their cart, the cart will be found on this page. This is also where your shoppers can see their total and adjust their order before checking out.
Checkout Page: After your shoppers have finalized the order in their cart, this is where they will land to checkout their order. Here they will enter their shipping and billing information, as well as choose their shipping method.
Account Page: Account pages are like personal profile pages, where your shoppers / customers can view things such as their orders and manage their information.
Luckily, WooCommerce will add these pages to your website automatically after completing the setup, however if you find that is not the case, adding these pages is simple.
Go to your WordPress dashboard and in the left sidebar under Pages click “Add New”
Then, title the page one of the four: Shop, Cart, Checkout, Account → Click “Publish”
Repeat this process to create a page for all four pages.
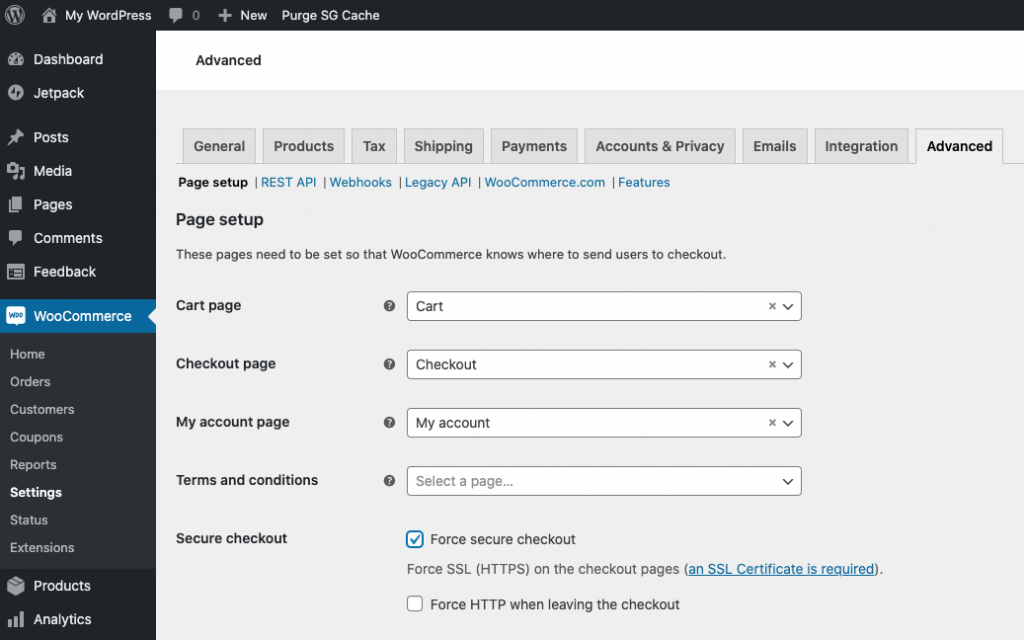
Next you will need to set sync these pages with WooCommerce. You will do that simply doing the following:
Go to your WordPress dashboard and in the left sidebar under WooCommerce click “Settings” → “Products”
You will then see Shop page and a drop down to the right asking you to “Select a page…” → Select the page you created for “Shop”

Next click the “Advanced” tab in the WooCommerce Settings.
You will then see drop downs for the other three pages you created (Cart, Checkout, Account) → Select the corresponding pages for each.
Click Save Changes after you are done.
After you complete the wizard and your essential pages are good to go, head over to “WooCommerce” in your WordPress dashboard left sidebar. Here you will find a few more steps to finish your store setup.
Set up tax
If your business charges sales tax, and you have installed Jetpack, WooCommerce can automate your sales tax calculations for you. If that is the option you’d like to choose, click “Yes please” (Recommended if you charge sales tax).
Note: Although WooCommerce can automate your sales tax calculations, we still recommend consulting with your local authorities to be sure of all current tax rules, rates, and regulations. Due to taxes being a complex matter, we highly suggest you refer to WooCommerce’s documentation on setting up taxes which can be found here.
If your business does not charge sales tax, choose that option.
If you would like to configure taxes manually, follow the steps below.

Configuring your sales tax rates manually is pretty straight forward.
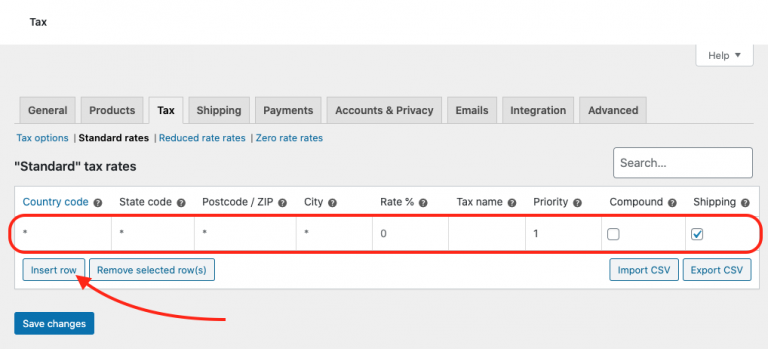
When you click “No thanks, I’ll configure taxes manually” you’ll be brought to the Tax tab of your WooCommerce settings section.
Here, you will be able to set a tax rate manually by clicking “Insert row” → Enter a Country code, State code, Postcode / ZIP, City, Tax Rate %, Tax name, Priority, etc.
You can also import a CSV file of tax rates!
Note, the example below is how to manually enter “Standard rates,” however, you can also enter “Reduced rate rates” and “Zero rate rates” by clicking those options below the main “Tax” tab.
Be sure to click Save changes when you are done.
Set up shipping
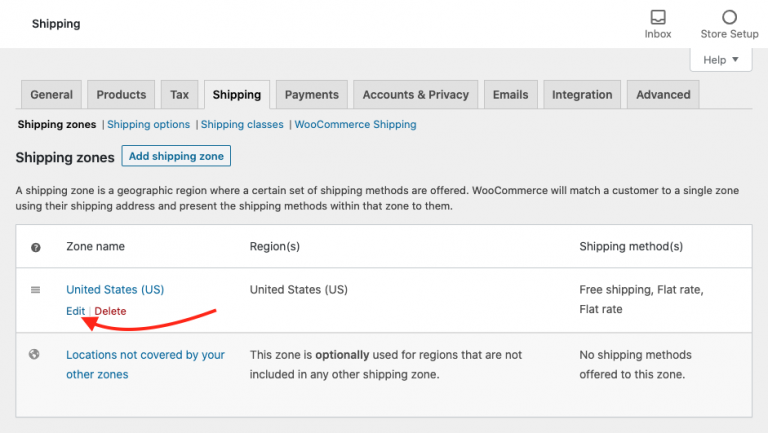
To set up shipping, go to WooCommerce → Settings → Shipping
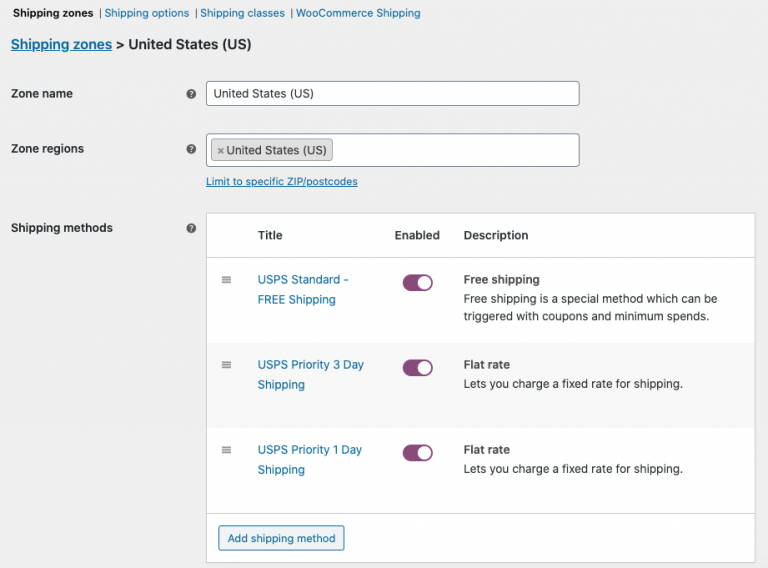
In Shipping Zones you should already have a default zone created from when you entered your store location in the wizard as the beginning. If not click “Add shipping zone” and add a zone (or if you want to add more than one shipping zone).
Then hover over the zone you want to configure and click “Edit” as shown below.
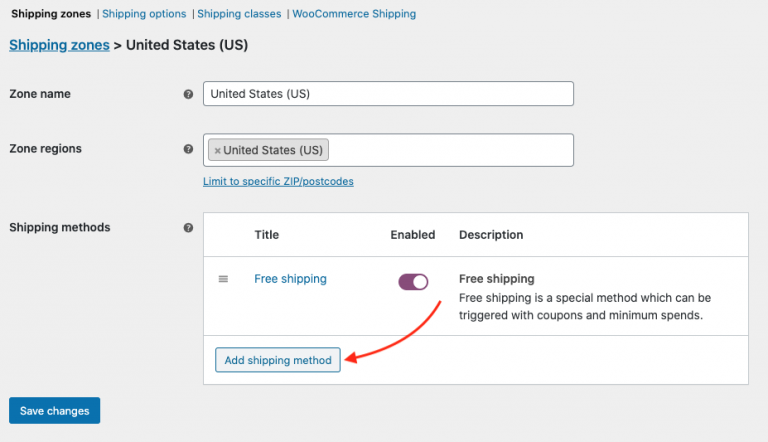
Here you will find the current shipping methods for the zone you are editing.
By default, there should already be a Free shipping method, you can either delete or edit this.
In this example we will be adding more shipping methods for the United States (US) shipping zone. So we’ll proceed to click “Add shipping method“
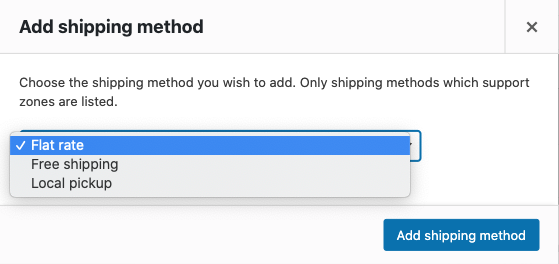
Now you will be asked to choose the shipping method you wish to add.
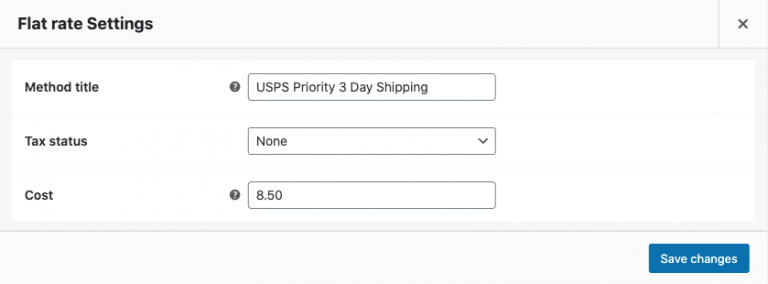
We will be choosing “Flat rate” as in this example shipping method, we will call for a flat cost if chosen.
Next, you will be asked to give the rate a title, tax status, and cost.
In this example, we will be using USPS Priority 3 Day Shipping for this method, so we will name it just that! You can name the method whatever you’d like, but we suggest you make it reflective of what the shipping method specifically is.
For Tax status, we’d again suggest you refer to WooCommerces Tax Settings Documentation found here. In this example, we will be choosing “None.”
Cost we set to $8.50
Then we will click Save Changes
We then repeated this step a second time to create another shipping method, and also added a Free shipping method. These will now be choices for the customer in this zone (United States) to choose from when checking out.
Make sure that you are aware of what shipping will actually cost you for the method you are creating and to the zone you are offering that method! The last thing you’d want to do is offer free shipping, and the actual shipping cost ends up being more than the order total! You could end up costing yourself money instead of making yourself money, because you didn’t do your homework!
Set up payment methods
To set up payment methods, go to WooCommerce → Settings → Payments
Although there are quite a few payment methods available, we would suggest Paypal and WooCommerce Payments (Powered by Stripe).
This also comes down to your specific business and business model, so you can choose whatever will work best for you.
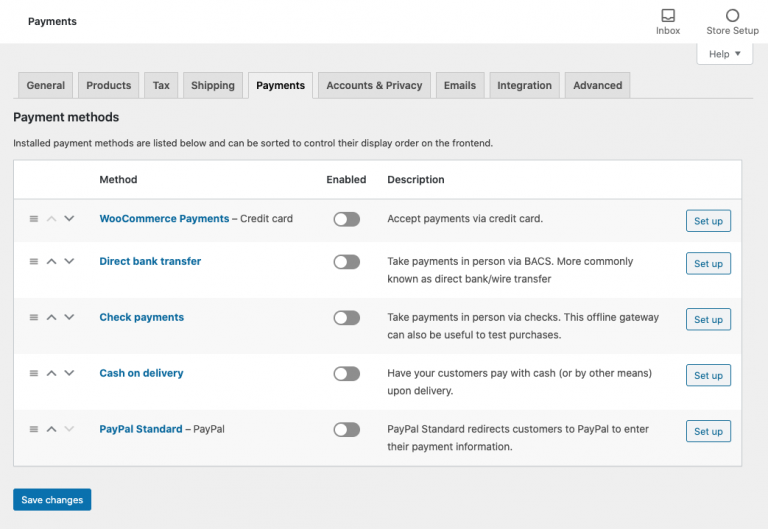
Setting up your payment methods of choice is simple. Just click “Set up” next to the payment method you’d like to make available on your store. Then, fill in the information required for that payment method and save your changes.
When you setup WooCommerce Payments, you will be taken through a setup wizard that will guide you through getting setup to accept credit card payments with WooCommerce/Stripe.
When setting up Paypal, keep in mind that you will need to already have a paypal account to receive payments. If you do not have one already, head over to paypal and create an account! Then you can enter your paypal information required during the set up in your payment settings.
Step 4. Add Products to Your Store
To add products to your store, go to your WordPress dashboard, and from the left sidebar menu under Products click “Add New“
From here you will create your new product. We suggest you follow this list in order for each product:
- Product name: This is the name of your product, and will appear with your product image on your shop page.
- Product description: This is where you can provide a full description of your product, and include any important details or information.
- Product info and data:
- General: This is where you will set your pricing.
- Inventory: Here you are able to track inventory / stock.
- Shipping: This allows you to set product weight, dimensions, and shipping class.
- Linked Products: This allows you to link products for up-sells and cross-sells.
- Attributes: Here you can set different product attributes such as alternative colors, sizes, and more.
- Advanced: Here you can do things like add a custom note to customers after purchase, create a custom ordering position, and enable/disable reviews. These features are optional, and not really necessary for most.
- Product summary: This is a very brief description of your product. It should not be too long and will appear on the product page typically under your product name.
- Product category: This is what will group your products together. Examples of categories for a clothing store would be Shirts, Pants, Shorts, Hats…
- Product tags: Tags help further group specific types of products together.
- Product image: This will be your main product image, that will appear on the product page.
- Product gallery images: These are an assortment of multiple images that help display your product and all of its features.
After you have completed all of the above section, go ahead and click “Publish” to create your product.
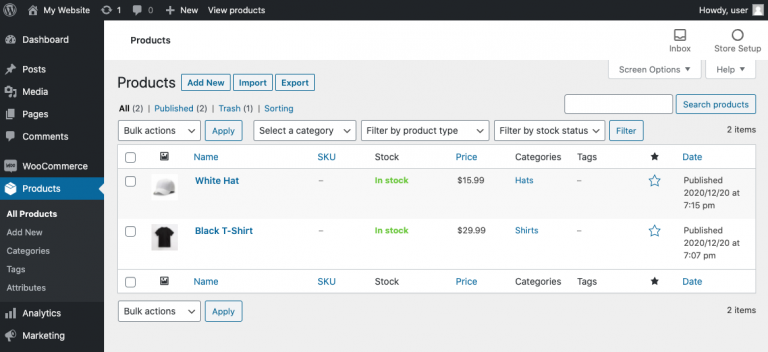
Now, when you view your products, it should look something like this!